Bits & Bytes

Posts Tagged ‘microsoft’

Using WPF in a C# Console Application

In this blog post, I demonstrate how to create a C# console application that can open a Windows Presentation Foundation window so that we can draw WPF graphics in a console program. The methodology is important because it can be used to add Windows Presentation Foundation classes to any type of C# project.

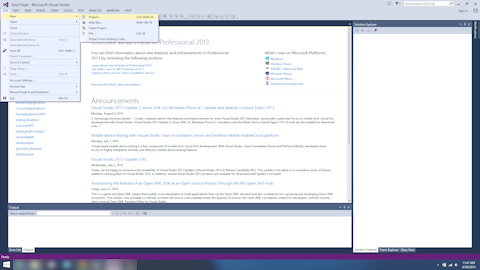
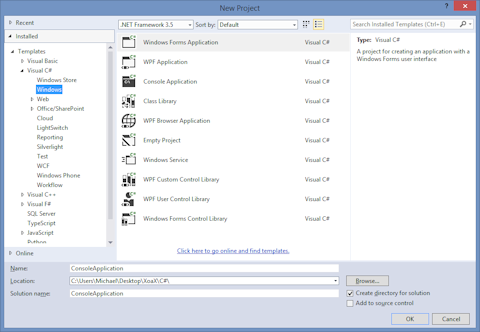
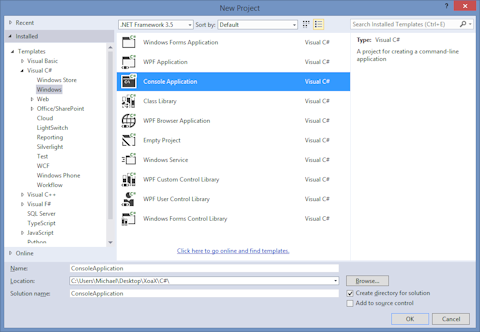
  1. To start, you should have a default C# Console Application project open. If you do not know how to create a C# console application project, you can consult our prior blog post on that topic.
    OpenProject
  2. Once you have a console application project open, it should have a Program.cs file with the following code inside it:
    using System;
    using System.Collections.Generic;
    using System.Linq;
    using System.Text;
    
    namespace ConsoleApplication {
        class Program {
            static void Main(string[] args) {
            }
        }
    }
    

    As the namespace indicates, the project was created using the default project name ConsoleApplication.

  3. We need to change some of the code. Begin by replacing the lines
    using System.Collections.Generic;
    using System.Linq;
    using System.Text;
    

    with the line

    using System.Windows;
    
  4. Directly after the line
    class Program {

    add this line

    [STAThread]
  5. Directly after the line
    static void Main(string[] args) {

    add the following lines of code:

    Window qWindow = new Window();
    qWindow.Title = "WPF in Console";
    qWindow.Width = 400;
    qWindow.Height = 300;
    qWindow.ShowDialog();
    

    The final program should look like this

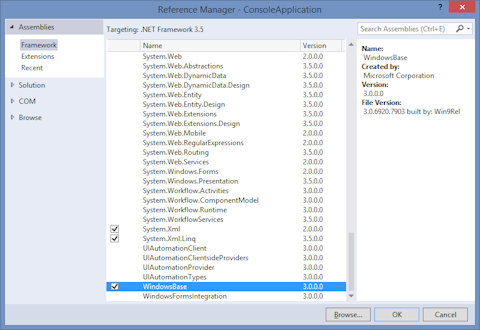
    using System;
    using System.Windows;
    
    namespace ConsoleApplication {
        class Program {
            [STAThread]
            static void Main(string[] args) {
                Window qWindow = new Window();
                qWindow.Title = "WPF in Console";
                qWindow.Width = 400;
                qWindow.Height = 300;
                qWindow.ShowDialog();
            }
        }
    }
    
  6. That is all of the code. Next, we need to add the libraries that the program uses. To do this, right-click References in the Solution Explorer pane on the right of the screen, and left-click Add Reference… in the context menu that pops up.
  7. That will open the Reference Manager dialog shown below. Navigate to Assemblies->Framework by left-clicking them, and then left-click the check boxes next to PresentationCore, PresentationFramework, and WindowsBase. Finish by left-clicking the OK button.
    ReferenceManager
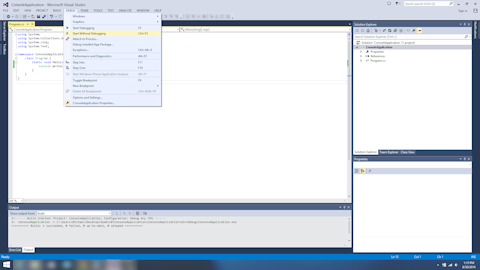
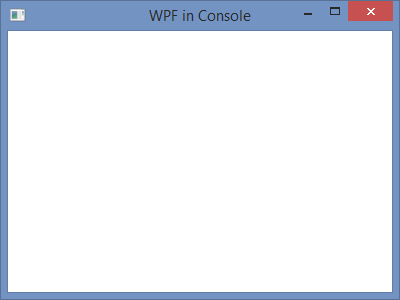
  8. Now the code and project are ready. To compile and execute the program, left-click DEBUG in the menubar and left-click Start Without Debugging in the submenu. When it finishes compiling, you should see this window:
    Output

Perhaps the most important line of code in this program is [STAThread]. Without this, you can not compile WPF code. STA stands for Single Threaded Apartment. It is a directive for COM. the Component Object Model. If that does not makes sense, feel free to ignore it.

The code inside the Main() function, creates a Window object, sets the text in the title bar, sets the size of the window to 400 by 300 pixels, and causes the window to be displayed with the call to ShowDialog().

Creating a C# Console Application in Visual Studio 2013

This post explains how to create a simple console application in C# and make it print out a message. Console applications are the simplest applications. So, this is the perfect place to start if you have no prior knowledge of C#.

  1. Navigate to the Start menu by left-clicking the Windows icon in the lower-left corner of your Desktop screen.
    Desktop
  2. Then left-click the down arrow in the lower-left corner to go the Apps section and find the Visual Studio 2013 icon.
  3. Left-click the Visual Studio 2013 icon to open the Visual Studio 2013 application.
    StartMenu
  4. Left-click FILE in the menubar, mouse over New in the submenu, and left-click Project in the submenu to open the New Project dialog.
    NewProject
  5. Select Installed->Templates->Visual C#->Windows in the left-hand pane.
    Installed_Templates
  6. Then left-click Console Application in the center pane.
    ConsoleAppplication
  7. If you want to accept the default project name and location, left-click the OK button to finish creating the console application. Otherwise, you can first:
    1. Set the name of the project in the field next to “Name:” near the bottom of the dialog.
    2. Select a location by left-clicking the “Browse” button.
  8. Now the project is created. To get the program to do something, add the line
    Console.WriteLine("God is Love!");

    to the code file “Program.cs” so that the final code looks like this:

    using System;
    using System.Collections.Generic;
    using System.Linq;
    using System.Text;
    
    namespace ConsoleApplication {
        class Program {
            static void Main(string[] args) {
                Console.WriteLine("God is Love!");
            }
        }
    }
    
  9. To compile and run the program, left-click DEBUG in the menubar and left-click Start Without Debugging in the submenu.
    StartWithoutDebugging
  10. When the program finishes compiling and runs, a console window should open like this one with the message “God is Love!” inside of it.
    Output

Printing Messages to the Console Window in C#

This is one of the most fundamental elements of C# programming. In a simple console application, we often want to output some value or set of values to the console window where we can see them. To do this, we can call the functions Console.Write() and Console.WriteLine(). Both of these functions can be use with all of the primitive data types, including strings. The main difference between the functions is that the second one puts an endline or linefeed/carriage return at the end of the output to set the future output to the next line.

To demonstrate, we have a simple program below that prints the closing prices on a given day for two company stock symbols: MSFT and RSH. These two symbols, MSFT and RSH, are the ticker symbols for the companies Microsoft and Radio Shack. This is a simple Console Application project. All of the code outside of the Main() function is standard, boilerplate code that is generated by the Visual Studio IDE. So, we will ignore that and talk about the output statements inside the Main() function.

Inside the Main() function, I start with four lines that output message “Closing Prices – Date: 8/21/2014” with a line underneath it. Notice that I used the Console.Write() function for the first two print statements so that all of the text from the first three statements was printed on one line. The next call to Console.WriteLiine() adds the endline to separate the output for the next line of dashes. The line of dashes is written with the Console.Write() function. However, I added the “\u000D\u000A” at the end which is the equivalent of a linefeed/carriage return or endline character. This makes the call the equivalent of a call to Console.WriteLine(). It is useful to know this, since this can be used anywhere inside of a string to create an endline.

In the last four lines, I output the symbols for Microsoft and Radio Shack along with their respective closing prices for the day. To do this, I created decimal type variables and assigned them values. The decimal data type requires that I put an “M” suffix at the end of each number so that the compiler interprets it as a decimal type. Then I call Console.WriteLine() twice for each string that is passed in. The first string is created automatically from the string literal, “MSFT: ” concatenated with the decimal value contained in dMsftPrice via the “+” operator. The final output look like this:

ConsoleOutput

using System;
using System.Collections.Generic;
using System.Linq;
using System.Text;

namespace MyConsoleApplication {
    class Program {
        static void Main(string[] args) {
            Console.Write("Closing Prices - ");
            Console.Write("Date: ");
            Console.WriteLine(new DateTime(2014, 8, 21).ToShortDateString());
            Console.Write("-----------------------------------\u000D\u000A");

            decimal dMsftPrice = 45.22M;
            Console.WriteLine("MSFT: " + dMsftPrice);
            decimal dRshPrice = .67M;
            Console.WriteLine("RSH:   " + dRshPrice);
        }
    }
}
 

© 2007–2024 XoaX.net LLC. All rights reserved.