RSS
RSS Atom
Atom Feedburner
This post explains how to create a simple console application in C# and make it print out a message. Console applications are the simplest applications. So, this is the perfect place to start if you have no prior knowledge of C#.
- Navigate to the Start menu by left-clicking the Windows icon in the lower-left corner of your Desktop screen.

- Then left-click the down arrow in the lower-left corner to go the Apps section and find the Visual Studio 2013 icon.
- Left-click the Visual Studio 2013 icon to open the Visual Studio 2013 application.

- Left-click FILE in the menubar, mouse over New in the submenu, and left-click Project in the submenu to open the New Project dialog.
- Select Installed->Templates->Visual C#->Windows in the left-hand pane.
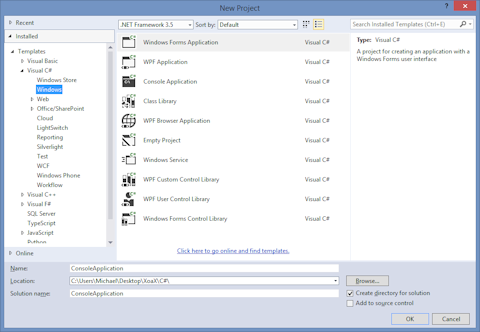
- Then left-click Console Application in the center pane.
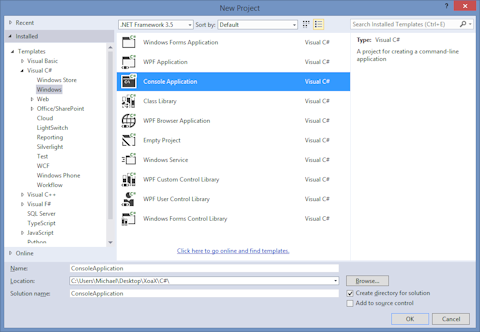
- If you want to accept the default project name and location, left-click the OK button to finish creating the console application. Otherwise, you can first:
- Set the name of the project in the field next to “Name:” near the bottom of the dialog.
- Select a location by left-clicking the “Browse” button.
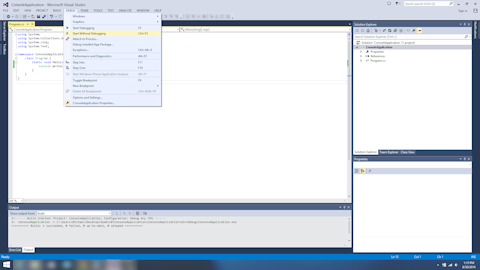
- Now the project is created. To get the program to do something, add the line
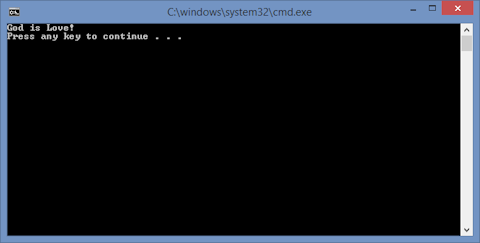
Console.WriteLine("God is Love!");to the code file “Program.cs” so that the final code looks like this:
using System; using System.Collections.Generic; using System.Linq; using System.Text; namespace ConsoleApplication { class Program { static void Main(string[] args) { Console.WriteLine("God is Love!"); } } } - To compile and run the program, left-click DEBUG in the menubar and left-click Start Without Debugging in the submenu.
- When the program finishes compiling and runs, a console window should open like this one with the message “God is Love!” inside of it.