Bits & Bytes

Posts Tagged ‘console application’

Creating Timer Events in C#

If you want something to happen in a C# program at regular time intervals, the ideal way is to create a callback function that makes use of the Timer class. Below, I have created a class called CTimedObject that holds a Timer object. In the constructor, the Timer is allocated with a time interval of 2000 milliseconds or 2 seconds. Then OnTimedEvent() is set as a callback using the += operator and the Elapsed property. Finally, The Timer is started via a call to Start().

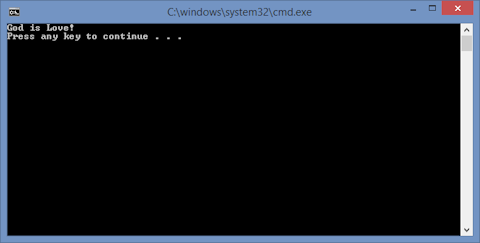
At this point, OnTimedEvent() will be called every 2 seconds. Inside the OnTimedEvent() function, the time is written to the console window via the passed in event object of type ElapsedEventArgs. The Object that is passed in is the Timer. Executing the program, the output looks like this

TimerEvent

Program.cs

using System;
using System.Timers;

namespace UsingTimers {
    class Program {
        static void Main(string[] args) {
            CTimedObject qTimedObject = new CTimedObject();
            Console.WriteLine("Press the Enter key to exit the program... ");
            Console.ReadLine();
        }
    }
}

CTimedObject.cs

using System;
using System.Timers;

namespace UsingTimers {
    class Program {
        static void Main(string[] args) {
            Timer qTimer = new Timer(2000);
            qTimer.Elapsed += OnTimedEvent;
            qTimer.Start();
            Console.WriteLine("Press the Enter key to exit the program... ");
            Console.ReadLine();
        }

        static private void OnTimedEvent(Object qTimer, ElapsedEventArgs eElapsed) {
            Console.WriteLine(eElapsed.SignalTime);
        }
    }
}

The code above demonstrates how to use a Timer in an object. Alternatively, we could do the same thing more simply if we just want the event to fire with a static function. Below, we have code that does exacly the same thing without using a separate class.

Program.cs

using System;
using System.Timers;

namespace UsingTimers {
    public class CTimedObject {

        Timer mqTimer = null;

        public CTimedObject() {
            mqTimer = new Timer(2000);
            mqTimer.Elapsed += OnTimedEvent;
            mqTimer.Start();
        }

        private void OnTimedEvent(Object qTimer, ElapsedEventArgs eElapsed) {
            Console.WriteLine(eElapsed.SignalTime);
        }
    }
}

Using WPF in a C# Console Application

In this blog post, I demonstrate how to create a C# console application that can open a Windows Presentation Foundation window so that we can draw WPF graphics in a console program. The methodology is important because it can be used to add Windows Presentation Foundation classes to any type of C# project.

  1. To start, you should have a default C# Console Application project open. If you do not know how to create a C# console application project, you can consult our prior blog post on that topic.
    OpenProject
  2. Once you have a console application project open, it should have a Program.cs file with the following code inside it:
    using System;
    using System.Collections.Generic;
    using System.Linq;
    using System.Text;
    
    namespace ConsoleApplication {
        class Program {
            static void Main(string[] args) {
            }
        }
    }
    

    As the namespace indicates, the project was created using the default project name ConsoleApplication.

  3. We need to change some of the code. Begin by replacing the lines
    using System.Collections.Generic;
    using System.Linq;
    using System.Text;
    

    with the line

    using System.Windows;
    
  4. Directly after the line
    class Program {

    add this line

    [STAThread]
  5. Directly after the line
    static void Main(string[] args) {

    add the following lines of code:

    Window qWindow = new Window();
    qWindow.Title = "WPF in Console";
    qWindow.Width = 400;
    qWindow.Height = 300;
    qWindow.ShowDialog();
    

    The final program should look like this

    using System;
    using System.Windows;
    
    namespace ConsoleApplication {
        class Program {
            [STAThread]
            static void Main(string[] args) {
                Window qWindow = new Window();
                qWindow.Title = "WPF in Console";
                qWindow.Width = 400;
                qWindow.Height = 300;
                qWindow.ShowDialog();
            }
        }
    }
    
  6. That is all of the code. Next, we need to add the libraries that the program uses. To do this, right-click References in the Solution Explorer pane on the right of the screen, and left-click Add Reference… in the context menu that pops up.
  7. That will open the Reference Manager dialog shown below. Navigate to Assemblies->Framework by left-clicking them, and then left-click the check boxes next to PresentationCore, PresentationFramework, and WindowsBase. Finish by left-clicking the OK button.
    ReferenceManager
  8. Now the code and project are ready. To compile and execute the program, left-click DEBUG in the menubar and left-click Start Without Debugging in the submenu. When it finishes compiling, you should see this window:
    Output

Perhaps the most important line of code in this program is [STAThread]. Without this, you can not compile WPF code. STA stands for Single Threaded Apartment. It is a directive for COM. the Component Object Model. If that does not makes sense, feel free to ignore it.

The code inside the Main() function, creates a Window object, sets the text in the title bar, sets the size of the window to 400 by 300 pixels, and causes the window to be displayed with the call to ShowDialog().

Creating a C# Console Application in Visual Studio 2013

This post explains how to create a simple console application in C# and make it print out a message. Console applications are the simplest applications. So, this is the perfect place to start if you have no prior knowledge of C#.

  1. Navigate to the Start menu by left-clicking the Windows icon in the lower-left corner of your Desktop screen.
    Desktop
  2. Then left-click the down arrow in the lower-left corner to go the Apps section and find the Visual Studio 2013 icon.
  3. Left-click the Visual Studio 2013 icon to open the Visual Studio 2013 application.
    StartMenu
  4. Left-click FILE in the menubar, mouse over New in the submenu, and left-click Project in the submenu to open the New Project dialog.
    NewProject
  5. Select Installed->Templates->Visual C#->Windows in the left-hand pane.
    Installed_Templates
  6. Then left-click Console Application in the center pane.
    ConsoleAppplication
  7. If you want to accept the default project name and location, left-click the OK button to finish creating the console application. Otherwise, you can first:
    1. Set the name of the project in the field next to “Name:” near the bottom of the dialog.
    2. Select a location by left-clicking the “Browse” button.
  8. Now the project is created. To get the program to do something, add the line
    Console.WriteLine("God is Love!");

    to the code file “Program.cs” so that the final code looks like this:

    using System;
    using System.Collections.Generic;
    using System.Linq;
    using System.Text;
    
    namespace ConsoleApplication {
        class Program {
            static void Main(string[] args) {
                Console.WriteLine("God is Love!");
            }
        }
    }
    
  9. To compile and run the program, left-click DEBUG in the menubar and left-click Start Without Debugging in the submenu.
    StartWithoutDebugging
  10. When the program finishes compiling and runs, a console window should open like this one with the message “God is Love!” inside of it.
    Output
 

© 2007–2024 XoaX.net LLC. All rights reserved.