Bits & Bytes

Posts Tagged ‘delete’

How to Schedule and Delete a Task

If you have any problems following these instructions, please consult our video on the subject. We begin by opening the Task Scheduler program. There are two ways to do this:

  1. Click the Start Button
    1. Click “Windows Administrative Tools” in the Start menu to open its submenu
    2. Right-click “Task Scheduler” open the context menu and click “Run as administrator”
  2. Enter “Task Scheduler” into the search box next to the start button
    1. Click “Run as administrator” in the pop up dialog

With either method, you should now have the Task Scheduler open and looking like:
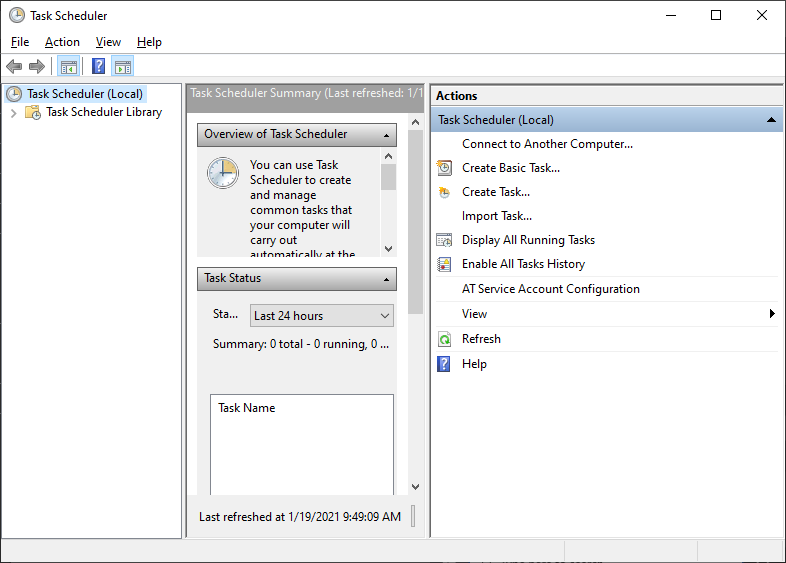
To create the new task, click “Action” in the menubar and “Create Basic Task…” in the submenu.

This will open the “Create Basic Task Wizard” shown below. Since we are going to create a task to open the command prompt, we entered “Command Prompt” in the Name: box and “Open a command prompt” in the Description: box. However, you should use whatever name and description are appropriate for your task.
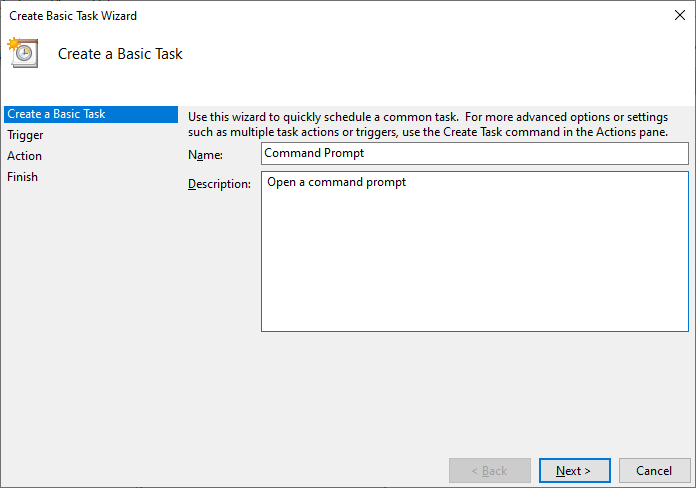
Since we want to create a task to run a program every day, just click the “Next” button four times until we get to the “Start a Program” screen.
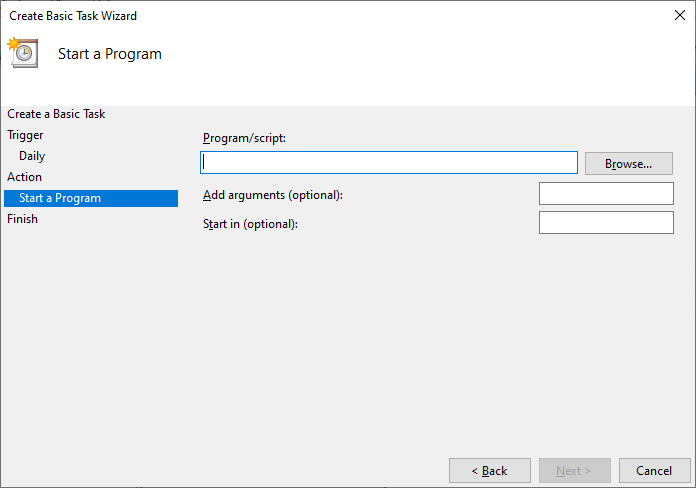
At this point, we can enter the file path to our application in Program/script: box or click the “Browse…” button to select the application program. Since we are going to use the command prompt program, our Program/script: is cmd.exe as shown below.

We can finish creating the task by clicking the “Finish” button. To see the task, you might need to click “Task Scheduler Library” as shown.
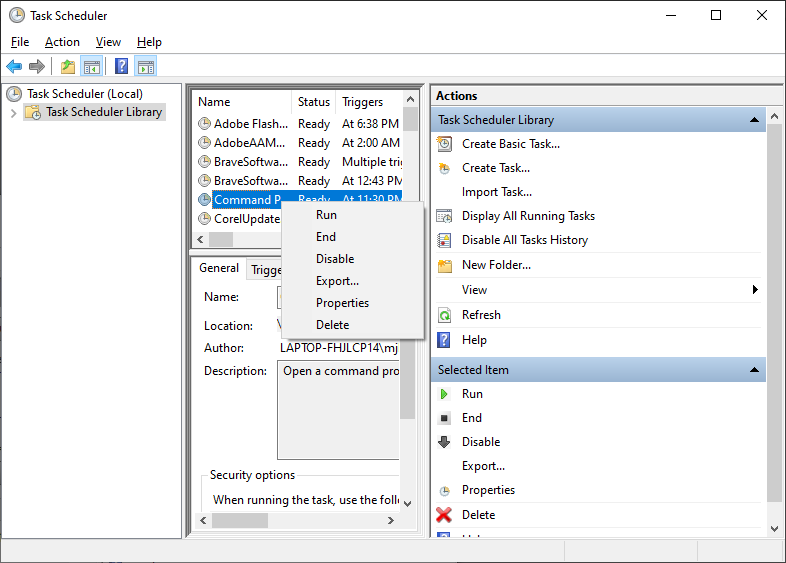
Now, we can right-click the new task in the list to show the context menu above. This allows us to “Run” or “Delete” the task as we so choose. Selecting “Run” will run the application and selecting “Delete” will take us through a confirmation dialog and then remove the task.

How to Stop Losing Saved Flash Games

If you play Flash games with any frequency, you have probably noticed that, after a while, your saved games will disappear. Then you have to start the game from scratch and play through the entire game from the beginning again. Here, we show you how to fix this problem.

Expanding your browser’s cache does not prevent games from being erased. In fact, saved Flash games are stored in a location that is used across browsers. So, you can play the same game and continue your saved progress in any browser. However, you need to follow the steps below to prevent your saved games from being prematurely erased.

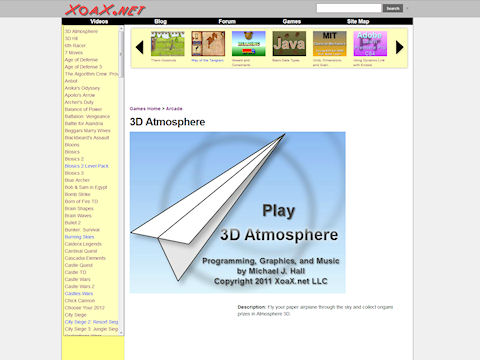
First, navigate to a page with a game on it, like this one.

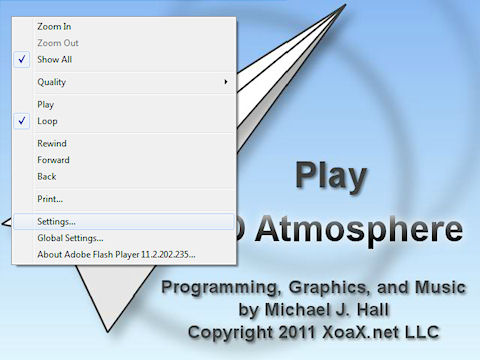
Next, right-click inside the game window to bring up the context menu shown below and then left-click “Settings…” in the context menu.

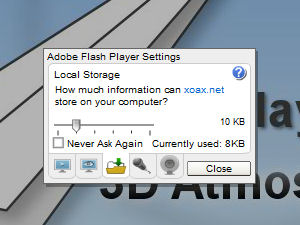
This opens the Adobe Flash Player Settings dialog shown below. Left-click the “Local Storage” tab so that your settings dialog looks like the one below. Notice that the dialog asks how much storage xoax.net can use. This means that the storage is based on the website that you playing on, but not the game. By default, the value will be something small, like 10 kilobytes. With the default setting, the storage will run out fairly quickly, and you will lose all of your saved games, unless you increase the storage maximum.

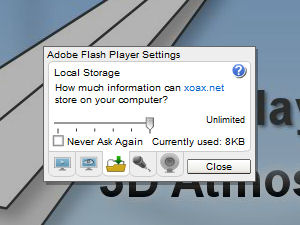
To increase the storage, left-click and drag the slider to the right to increase the storage limit. I would recommend setting it to “Unlimited” so that you don’t have to worry about losing your progress. Note that you can see how much space is currently being used too. When you are done, left-click the close button and play some games!

Beware of clearing your browser’s cache. This may cause the Flash games to lose their storage, indirectly.


© 2007–2024 XoaX.net LLC. All rights reserved.