
Win32 C++
Lesson 1 : Creating a Simple Win32 Application
Overview
This C++ Win32 video tutorial demonstrates how to create a simple Graphical User Interface (GUI) application. Win32 is the GUI Application Programming Interface (API) for Windows.
Download Code
This lesson requires that you have an installed version of Visual C++ 2010. If you have not already installed it, you can follow the instructions in our C++ Console Lesson 0 video.
- Open Visual C++. Left-click "File" in the menubar, mouse over "New," and left-click "Project" in the submenu.
- This opens the "New Project" dialog, which should look like this. If it does not, left-click "Visual C++" and "Win32" in the left-hand pane under "Installed Templates."
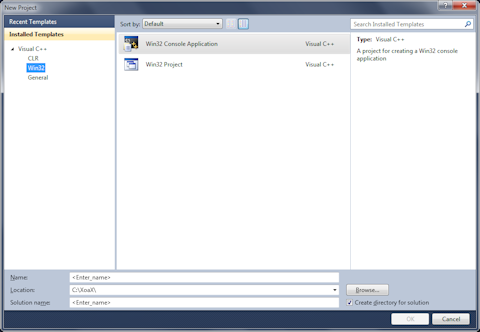
- In the center pane, left-click "Win32 Project" and left-click the box next to "Name:" and enter "Win32Lesson1." Finally, left-click the "OK" button to go on.
- This opens the "Win32 Application Wizard." Just left-click the "Finish" button to create the project.
- Now, you should see the created project with the code file "Win32Lesson1.cpp" in it.

- To compile and execute the program, left-click "Debug" in the menubar and left-click "Start Debugging" in the submenu.
- You might see a dialog come up telling you that the project is out of date. If so, just left-click the "Yes" button to go on.
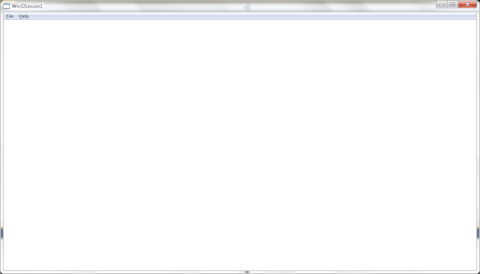
- Once the program is compiling and running, you should see this blank window come up. That is our first program, we will add functionality in the coming lessons.
© 2007–2026 XoaX.net LLC. All rights reserved.