
Core Java
Lesson 1: Hello World
This Java video lesson demonstrates how to write, compile, and run a simple Java program that outputs the message "Hello World!" For this lesson, you need to have the NetBeans IDE and the JDK installed as we showed in Java Lesson 0
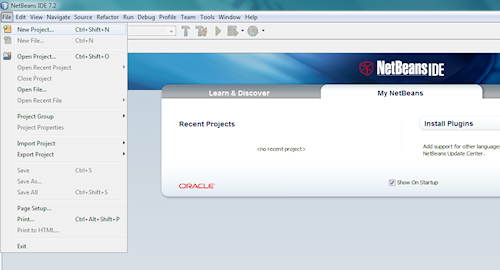
- To start, you should have the NetBeans IDE open. Then left-click File in the menubar and left-click New Project in the submenu.
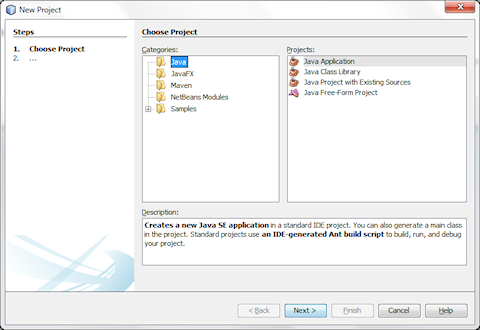
- This will open the "New Project" dialog. By default, it should appear as it does below. If not, left-click Java under "Categories:" and left-click Java Application under "Projects:" in the "New Project" panes shown here. Then left-click the Next button to continue.
- This takes you to the next step in creating the new project: naming it. The project is named "JavaApplication1" by default. To change it, left-click the box next to Project Name: and type "JavaLesson1" into the box. This will change the other settings, as shown below. Then left-click the Finish button to begin creating the project.

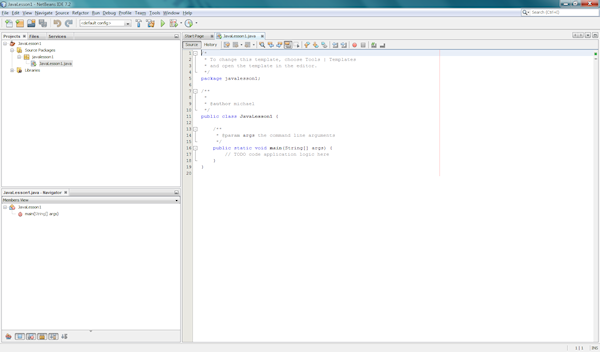
- It will take a minute or so to create the project. When it is done, the IDE should look like this.
- Left-click inside the JavaLesson1.java pane and add this line of code
System.out.println("Hello World!");under the comment "TODO code application logic here" as shown below.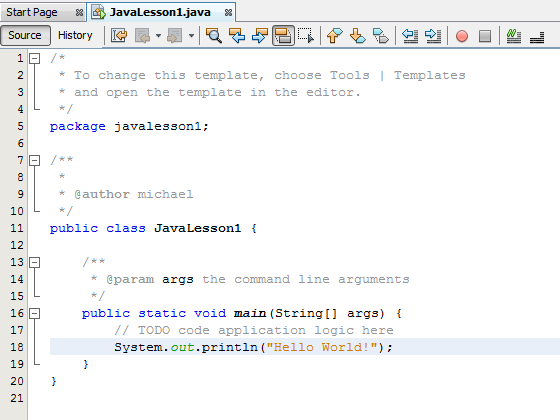
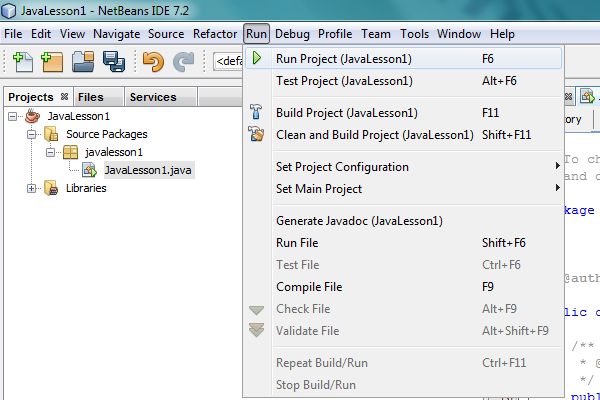
- That is all we need to code our first program. To compile and execute it, left-click Run in the menubar and left-click Run Project (JavaLesson1) in the submenu.
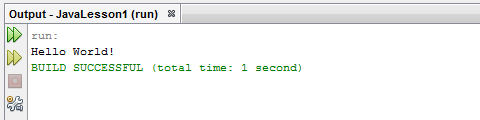
- When the program is done compiling, you should see the message "Hello World!" in the output pane.
These are the basic steps involved in creating and running a simple program. We will be using these same steps for most of our programs, but we will change the code to introduce new concepts.
© 2007–2026 XoaX.net LLC. All rights reserved.