
Core Java
Lesson 0: Installation
This Java Lesson demonstrates how to install what you will need to program in Java using the Standard Edition (SE).
- To begin press CTRL and left-click this link to open the Oracle downloads page in a new tab or window.
- Then left-click the NetBeans download icon to go to the NetBeans download page.

- In the middle of the page, left-click the radio button to accept the license agreement.

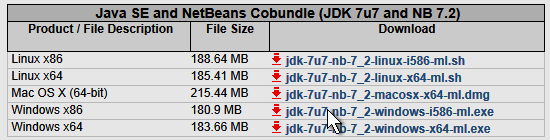
- Below this, we have the download links for various operating systems. Find yours and left-click the link to begin the download. I had problems with the 64 bit installation on Window. So, if you are on Windows, I would recommend that you use x86.
- After you click that link, you may see a message asking you whether you want to run or save the file. Left-click the Run button.
- This begins the download, which may take a while. It depends on your connection speed. When it is done with the download, you may see another dialog or two warning you that the publisher is unverified. Left-click Run to continue.
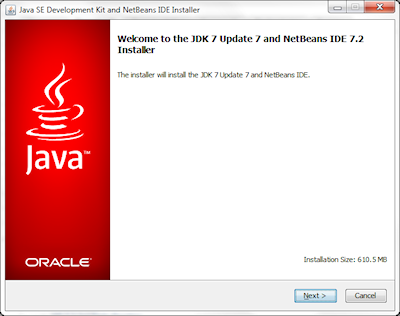
- This starts the installer, and pops up a progress bar. When it is done, you should see the installation wizard. Left-click Next.
- This brings up the JUnit license agreement. To accept the terms, left-click the radio button and then left-click Next.
- Now you should see the directory for the JDK installation. Leave it as is and left-click Next to accept the default directory.
- After that, you should see the directories for the NetBeans installation. Again, leave it as is and left-click Next.
- Finish off the wizard, by left-clicking Install to begin the installation. It should run for a few minutes. When it is done, left-click Finish to complete the installation.
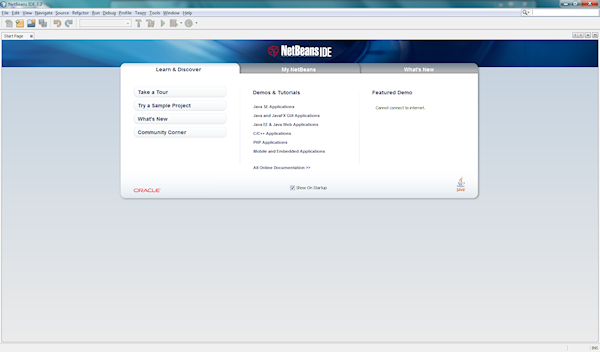
- Finally, we can open up NetBeans, by left-clicking the Start menu and left-clicking NetBeans in the program list.
© 2007–2026 XoaX.net LLC. All rights reserved.