
Core Development
How to Install IIS
This computer development video tutorial demonstrates how to install the Microsoft's Internet Information Services (IIS) web server on a computer that runs the Windows 8 operating system.
- To begin, move the cursor to the upper-right corner of the screen and pull it down along the edge to open the side menu.
- Left-click the Search icon in the side menu to open the Search box in the side menu.
- Inside the search box, enter "Turn Windows features on or off" and left-click the icon underneath it to open the Windows Features dialog.
- Inside the dialog, find Internet Information Services and left-click the box next to it to select it for installation.
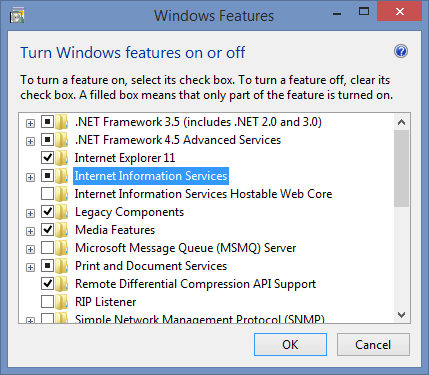
- Additionally, you can open the submenus to install any additional commponents that you would like. For example, I added .NET Extensibility 3.5, .NET Extensibility 4.5, Application Initialization, ASP.NET 3.5, and ASP.NET 4.5 to the installation.
- Finally, left-click the OK button to finish.
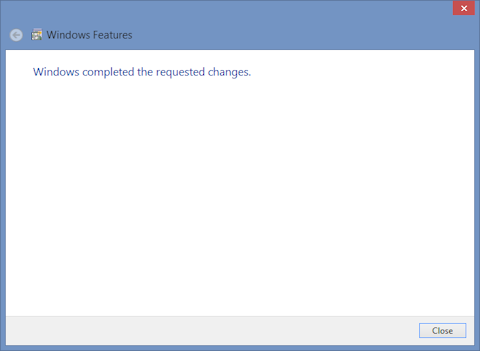
- After you click the OK button, you should see a progress dialog that says Searching for required files. After a brief time, the message will change to Applying changes. This message may remain for quite a while. When it is done, it will change to Windows completed the requested changes. Left-click the Close button.
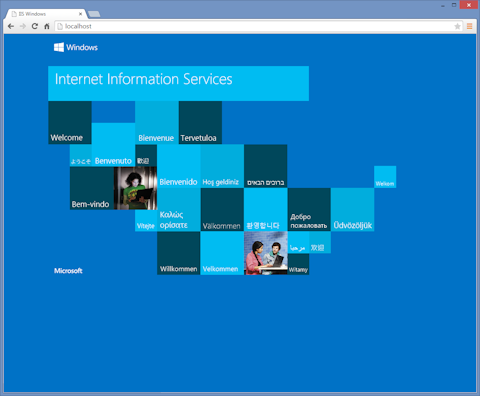
- To see that IIS is working, open a brower and enter "http://localhost/" into the address bar box and you should see a screen like this one that indicates that IIS is running.
© 2007–2026 XoaX.net LLC. All rights reserved.