
Win32 C++
Lesson 9 : Loading and Displaying Bitmaps
Overview
In this C++ video, we demonstrate how to load and display bitmap images in a window. For this lesson, we made changes to our basic Win32 project that we created in Lesson 1. The bulk of the code that we added, is in a function call LoadAndBlitBitmap(), which takes the filename and path of bitmap (.bmp) file and a handle to the main application window's device context.
Download Code

The loading and blitting process requires five function calls. We begin by loading the image with a call to the LoadImage() function. Then, we create a memory device context that is compatible with the device context of the window by making a call to CreateCompatibleDC(). To find out about the bitmap that we loaded, particularly the size, we call GetObject() to fill in a BITMAP structure's data with information. Then we select the bitmap into our memory device context as its drawing surface by calling SelctObject(). Finally, we perform the blitting by calling BitBlt().
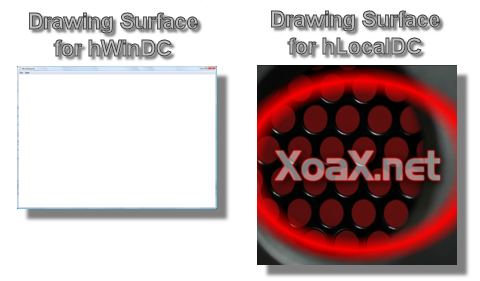
Device contexts have many attributes such as pens, brushes, etc, which define how drawing is done. Additionally, these device contexts have drawing surfaces for drawing to. In the image above, we show drawing surfaces of our window and the drawing surface of the memory device context that we created. To be specific, the drawing surface of our window is only the client area and the drawing surface of our memory device context is the bitmap only after we select the bitmap into it.
For our blitting function, we have the following signature:
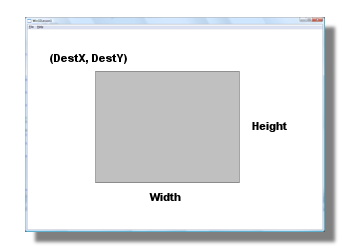
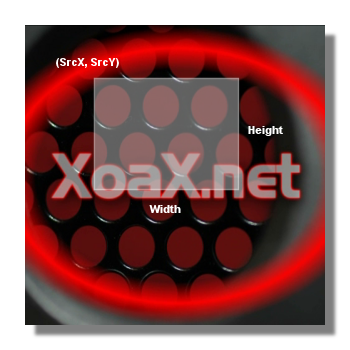
BitBlt(DestDC, DestX, DestY, Width, Height, SrcDC, SrcX, SrcY, Oper)
The arguments DestDC and SrcDC are handles to the destination and source device contexts, shown above and below respectively. The coordinates (DestX, DestY) and (SrcX, SrcY) are the upper-left corners of the blitted region in the destination and source device contexts, respectively. The parameters Width and Height define the size of the blitted region in both device contexts. Finally, the parameter Oper defines that operation that is performed for the blitting. In our example, we use a simple copy from the source to the destination, but there are many other alternatives. The loading and blitting is performed via a function call from the WndProc() function's WM_PAINT handler.
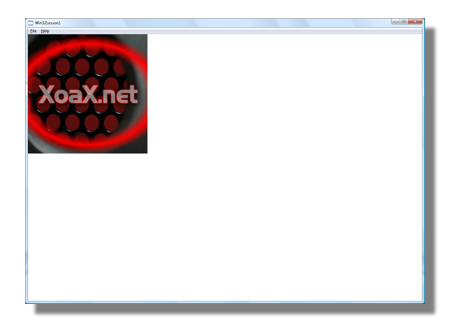
To execute our program, we need to first build the executable by selecting "Build" in the menubar and "Rebuild Solution" in the submenu. When this is finished, we can run the program by selecting "Debug" in the menubar and "Start Without Debugging" in the submenu. This will bring up the application window with the XoaX.net logo bitmap displayed inside of it (shown below).
© 2007–2026 XoaX.net LLC. All rights reserved.