
Visual C++
Creating an Executable (.exe) 2010
For this lesson, we demonstrate how to create an executable (.exe) file in Visual C++ 2010 that you can transfer to other machines and run independently of Microsoft Visual Studio.
- We begin with a project that that was created with Microsoft Visual Studio 2010 using the steps in our console Lesson 1 video. The initial code for the project is a simple "Hello World!" program, which is shown here:
- There are two build configurations for C++ projects: Debug and Release. Our procedure for creating an executable will depend on the configuration, which is Debug by default. Since it is the default, we will show how to create an executable using the Debug configuration with the understanding that the Release configuration can be done similarly.
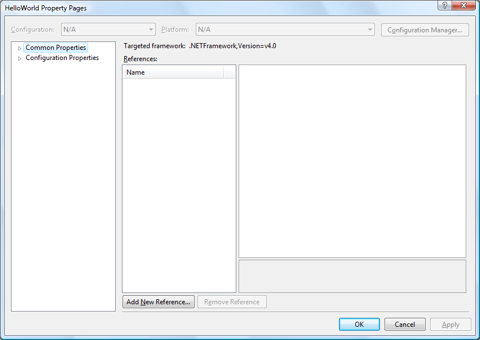
- To see your current build configuration, left-click "Project" in the menubar and left-click "Properties" in the submenu to open the "Properties Pages" dialog shown above.
- Left-click "Configuration Properties" and you should see "Active(Debug)" in the box next to "Configuration:" in the upper-left corner of the dialog. This tells us that the active or current configuration is Debug.
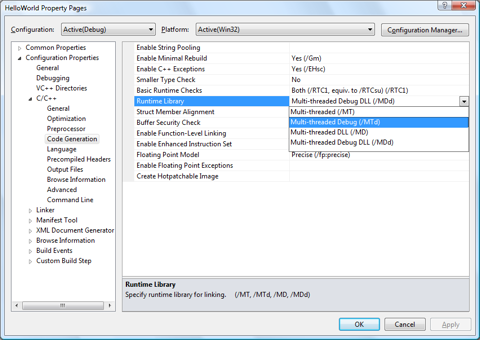
- Next we want to eliminate our executable's .dll file dependency so that we can run it on any other Windows machine, even if it does not have the .dll file that we are currently using.
- To do this, left-click the arrow next to "Configuration Properties" and then left-click the arrow next to "C/C++" to expand the lists below them. Then left-click "Code Generation" below this and left-click "Multi-threaded Debug DLL" next to "Runtime Library."
- Now you should see a drop-down arrow next to "Multi-threaded Debug DLL." Left-click the arrow to expand the list, and left-click "Multi-threaded Debug" in the list. Finally, commit the changes by left-clicking the "Apply" button and then the "OK" button.
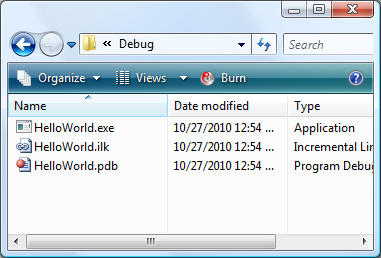
- Build the executable by left-clicking "Debug" in the menubar and "Build Solution" in the submenu.
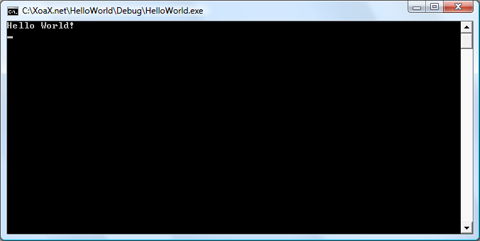
- Now navigate to the solution folder for the current project. This is where the .sln file is. There you should see a "Debug" folder. Double-click the "Debug" folder to enter it and you will see your executable file with the .exe extension. Double-click this file to run the program and you will see the window open.
#include <iostream>

int main() {
    std::cout << "Hello World!" << std::endl;
    std::cin.get();
    return 0;
}
© 2007–2026 XoaX.net LLC. All rights reserved.