
Miscellaneous C++
The Matrix Effect
Overview
In this C++ video tutorial, we demonstrate how to create a Matrix-styled effect. You can download the project using the link next to the video above.
Download Code

This program builds on the prior C++ console lesson, where we demonstrated how to create platform-independent Matrix-like effects. In this program, we have added coloring to the previous code to greatly enhance the effect. However, this code uses Windows-specific function calls that will not work on other platforms. Below, we explain the changes that we have made to our previous program; the complete code is shown at the bottom of the page.
First, we added an include statement for the Windows library:
#include <windows.h>
This statement includes the Windows header file and allows us to make Windows-specific function calls.
At the beginning of the main() function, we added three lines that change the text color for the console window:
HANDLE  hConsole;
hConsole = GetStdHandle(STD_OUTPUT_HANDLE);
SetConsoleTextAttribute(hConsole, 2);
A HANDLE is a Windows-specific type that is used to refer to a Windows object, much like a pointer. The second line returns a handle to the console window buffer. Hwever, we never use handles to access objects directly. Instead, we pass the HANDLE type to a Windows function in order to use or change the object to which it refers, as we do with our call to SetConsoleTextAttribute(). That function call changes the output text color to green.
Next, we changed the code inside of our while-loops. Specifically, we added these lines
if (((i*i + k) % 71) == 0) {
	SetConsoleTextAttribute(hConsole,  7);
} else {
	SetConsoleTextAttribute(hConsole,  2);
}
inside the if statement to change the color of the text at random times.
What these lines do is set approximately 1 out of every 71 characters to be light green. The color 2 is green and the color 7 is a lighter shade of green, as specified by the Windows operating system. We added an additional call later in the while-loop to set the text to green again, so that we will only generate one light green character at a time.
Finally, we replaced previous delay loop with a simple call to the Sleep() function:
Sleep(10);
This function call sets the loop delay to 10 milliseconds after each line, and provides a more uniform delay, since it does not depend on the speed of the CPU.
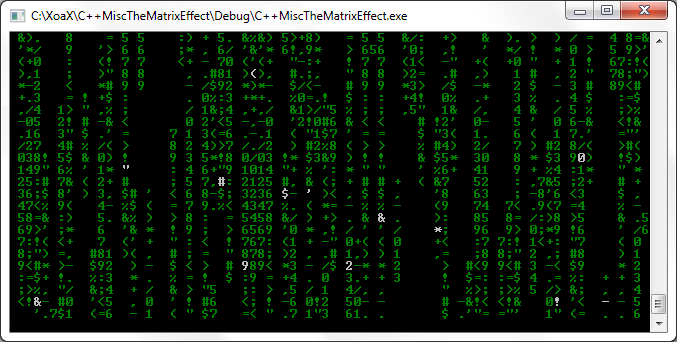
The output of the program looks like this:
#include <iostream>
#include <windows.h>

int Modulus(int iN, int iMod) {
	int iQ = (iN/iMod);
	return iN - (iQ*iMod);
}

char GetChar(int iGenerator, char cBase, int iRange) {
	return (cBase + Modulus(iGenerator, iRange));
}

int main() {
	// Color code
	HANDLE  hConsole;
	hConsole = GetStdHandle(STD_OUTPUT_HANDLE);
	SetConsoleTextAttribute(hConsole, 2);

	char caRow[80];
	int j = 7;
	int k = 2;
	int l = 5;
	int m = 1;
	while (true) {
		int i = 0;
		// Output a random row of characters
		while (i < 80) {
			if (caRow[i] != ' ') {
				caRow[i] = GetChar(j + i*i, 33, 30);
				if (((i*i + k) % 71) == 0) {
					SetConsoleTextAttribute(hConsole,  7);
				} else {
					SetConsoleTextAttribute(hConsole,  2);
				}
			}
			std::cout << caRow[i];
			++i;
			SetConsoleTextAttribute(hConsole,  2);
		}
		j = (j + 31);
		k = (k + 17);
		l = (l + 47);
		m = (m + 67);
		caRow[Modulus(j, 80)] = '-';
		caRow[Modulus(k, 80)] = ' ';
		caRow[Modulus(l, 80)] = '-';
		caRow[Modulus(m, 80)] = ' ';
		// Delay
		Sleep(10);
	}
    return 0;
}
© 2007–2026 XoaX.net LLC. All rights reserved.