
MFC C++
Lesson 1 : Creating a Simple SDI Application
Overview
This MFC video tutorial demonstrates how to make a simple GUI application. MFC stands for Microsoft Foundation Classes and is a C++ class library, which wraps the Win32 API (Application Programming Interface) in a cleaner, simpler form. SDI stands for Single Document Interface, which we will explain more when we talk about the architecture of MFC applications.
Download Code
For this lesson, and to create MFC applications in general, you need to have Microsoft's Visual C++ or Visual Studio Standard Edition or higher (Professional or Enterprise). MFC is not available in the free Express Editions.
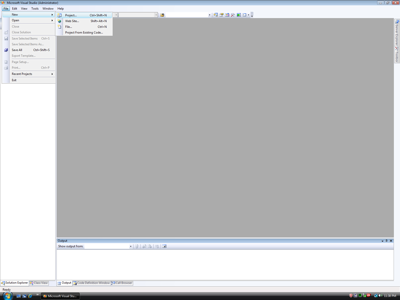
- Open Visual Studio. Go to the "File" menu, mouse over "New", and then left-click "Project" in the submenu. This will open the "New Project" dialog.
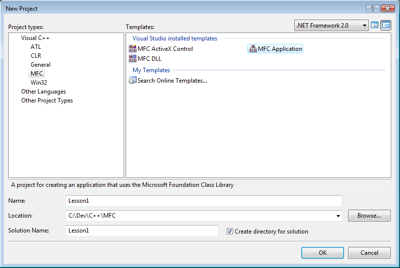
- In the dialog, open the "Visual C++" section in the "Project Types" box and select "MFC". Then in the right area window, left-click "MFC Application". Next, rename the lesson "Lesson1." Finally, select a location for the project by using the "Browse" button and click the "OK" button when you are done.
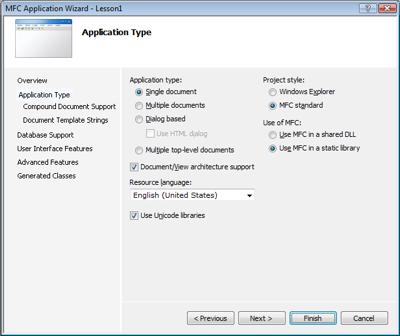
- This will start the "MFC Application Wizard." Left-click "Application Type" in the left-hand area. Next, select the radio button next to "Single document" under "Application type:". Then, select the radio button next to "Use MFC in a static library" under "Use of MFC:". Finally, click the "Finish" button to create the project.
- Now, to compile and execute the program: left-click "Debug" in the menubar and then left-click "Start Without Debugging".
- This will pop up a message box to ask whether you would like to build the program. Click the "Yes" button.
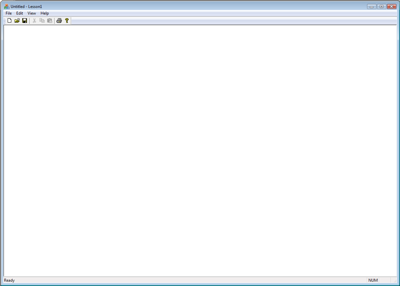
- When the program finishes compiling and runs, you will see a window entitled "Untitled - Lesson1." This window is the SDI application that was created.
© 2007–2026 XoaX.net LLC. All rights reserved.