
Core C++
Lesson 48 : The main() Function
In this C++ video tutorial, we explained the main() function. The main() function is where the entire program is executed and the execution begins at the start of main().
There are three versions of main() that we discuss. However, only two of them are in the C++ standard. The third is a variation that is supported by Microsoft's compiler: it takes no parameters and returns none. So, it is the simplest main(), but we have discontinued its use since it is not supported by some other compilers.
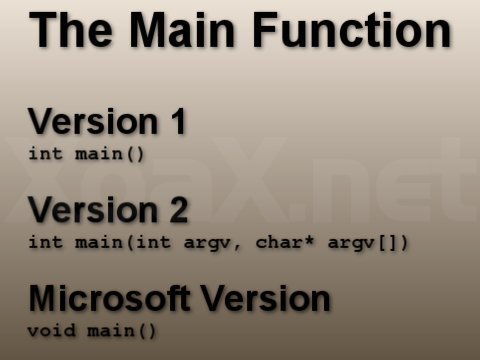
The other two versions of main(), which are in the C++ standard, both return an int variable. The first takes no arguments and the second takes an array of strings, argv, and an int argument, argc, to indicate how many strings are in the array. The method for passing in these parameters into main() is not obvious.
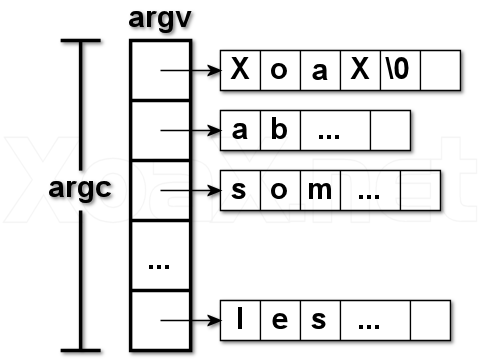
Our second program, with the code below is convenient for testing parameter passing to main(). This program simply runs through the null-terminated ASCII strings in argv and outputs each one to the console window on a separate line.
#include <iostream>

int main(int argc, const char* argv[]) {

    for (int i = 0; i < argc; ++i) {
        std::cout << argv[i] << std::endl;
    }
    std::cin.get();
    return 0;
}
In the video, we explain three ways to arguments into main: via the command prompt, using a shortcut, and through the project's properties settings in Microsoft's IDE.
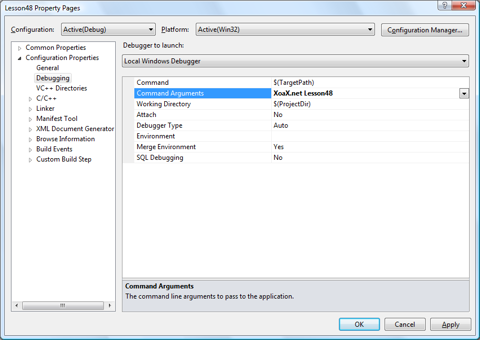
The most convenient way to pass parameters to main() when you are programming is to set the parameters in the IDE via the project's properties settings. To do this, first open the dialog by left-clicking Project and Lesson48 Properties and then select Configuration Properties and then Debugging, as shown above. Then enter your arguments in the box next to Command Arguments. Finally, Left-click the Apply button and then the OK button to confirm your changes.
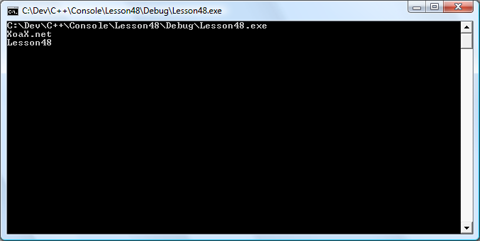
Remember that the first string that is passed into main() is the filename of the executable. So, access the arguments appropriately. Above, we show the output generated by executing program shown above with the arguments shown with the project properties above: XoaX.net Lesson48.
© 2007–2026 XoaX.net LLC. All rights reserved.